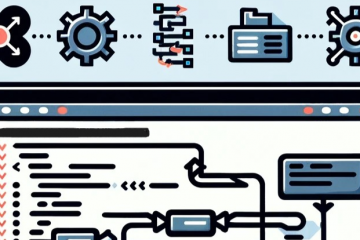
All nextflow and nf-core pipelines have been successfully configured for use on the HPC Cluster at New York University. The configuration applies required and recommended options in order to have efficient and reliable nextflow runs.
Below is the NYU HPC configuration and the latest version can always be found at nf-core GitHub.
The parameters max_memory, max_cpus, max_time, queueSize, and submitRateLimit do not hinder your nextflow workflows but sets the resource maximum set by HPC. For example, there is no compute node with 97 CPUs so if your workflow makes the reqeust for 97+ CPUs it will fail. The same logic applies to the other settings.
The process code block instructs nextflow on how to run using the cluster scheduler Slurm and how to handle errors by retrying up to 3 times.
Using the Nextflow Config
For nf-core pipelines, run the pipeline with -profile nyu_hpc. This will automatically apply the latest nyu_hpc.config.
#!/bin/bash -e
#SBATCH --nodes=1
#SBATCH --ntasks-per-node=1
#SBATCH --cpus-per-task=2
#SBATCH --mem=8GB
#SBATCH --time=24:00:00
#SBATCH --job-name=nextflow
#SBATCH --output=nf_%j.out
# The nextflow job manager does not require a lot
# of resources, 2 CPU and 8GB mem is more than enough
module purge
module load nextflow/23.04.1
# https://nf-co.re/scrnaseq/2.6.0
nextflow run nf-core/scrnaseq \
-profile nyu_hpc \ # <- Set the NYU_HPC profile
--input samplesheet.csv \
--genome_fasta GRCm38.p6.genome.chr19.fa \
--gtf gencode.vM19.annotation.chr19.gtf \
--protocol 10XV2 \
--aligner star \
--outdir $SCRATCH/nf_scrnaseq_out
For other nextflow pipelines, download the NYU nf-core config into your nextflow working directory and include it in your nextflow run command as shown below. Note the capital -C for the nyu_hpc.config, which is provided before the run command, and the lower case -c for your.config, which is provided after the run command.
# Download the config
wget https://raw.githubusercontent.com/nf-core/configs/master/conf/nyu_hpc.config
# Execute the nextflow
nextflow -C nyu_hpc.config run -c your.config main.nf
Please reach out to hpc@nyu.edu if there are any questions.
Being rejected from the preprint server, bioRxiv, seemed like a new low for me. But, I was heartened to know that I was in goodcompany. At least an explanation was provided by the bioRxiv team that “every submitted manuscript is examined by affiliate scientists to determine its suitability for posting. bioRxiv is intended for full research papers and on screening, our affiliate scientists determined that this manuscript fell short of that description.” Fair enough. I can’t say that I disagree with my esteemed colleagues who serve as affiliate scientists. I know that there are other preprint servers as discussed in response to this tweet. But, I’m less familiar with those alternatives and it’s not clear to me why we need multiple preprint servers.
Needless to say, the paper was also rejected from several academic journals.
At this point, the options for a manuscript are limited and the most probable fate is that the paper enters a dormant state on my google drive, occasionally encountered when searching for something else, to provide a reminder of the unrealized time and effort that had been exerted.
The paper we were trying to publish is not earth shattering. We had encountered a persistent problem in trying to edit genome sequence and annotation files when analyzing whole genome sequencing data from organisms that we had genetically modified. We developed a bioinformatic solution that has been useful for us and we made the code, and a web implementation, publicly available.
We know that researchers outside of our institution have used this tool and we thought that reporting the resource, and demonstrating its utility, in a paper, would inform other members of the community who might benefit from its use. Furthermore, making and testing the tool, writing the paper, and submitting the manuscript all required effort. Keeping the paper to ourselves represents a significant investment of time and resources with no return.
The purpose of academic publishing is to create a permanent record of a scientific contribution that is of use to the wider community. Traditionally, this record was in the form of a published paper report, which since evolved into an electronic facsimile of the same process. In the digital era, methods have been developed to replicate the permanence of a paper version such as the use of digital object identifiers (DOIs).
Until recently, a published paper was given an aura of authority by the fact that it had undergone anonymous peer review – a 20th century invention that is widely recognized to be deeply flawed, but nonetheless retains outsized importance. The remarkable success of preprint servers like bioRxiv and medRxiv, and the demonstration that they have accelerated the dissemination of science during the COVID pandemic, has made clear that the process of anonymous peer review, as currently practiced by most scientific journals, may be unnecessary and outdated.
I was intrigued by the introduction of non-fungible tokens (NFTs), which provide a means of defining a unique version of an electronic file. An NFT provides a record of a unique copy of an electronic file that is retained on a ledger, using a decentralized blockchain technology, which can be viewed by anyone. There have been a number of high profile demonstrations of how NFTs can create value for electronic files (see also Disaster Girl). But, when I saw that UC Berkeley was selling NFTs for their patents of Nobel Prize winning science, it occurred to me that minting an NFT for a scientific paper would be a means of creating a unique record of the presentation of a paper to the rest of the world. The goal in this case is not to sell the NFT, but to use the immutability of NFTs to create a permanent record of the electronic file and its public availability.
To test this idea, for the price of 0.00186 ether (US$3.78 at time of minting) we minted an NFT for our paper. The NFT ensures that we have a record (and ownership) of the original digital file that is an instance of our paper. By minting the NFT and recording this event using blockchain we can now consider the paper published.
Scientific publishing has been remarkably resistant to the changes brought about by the digital age. When I was an editor at Nature Genetics in the early 2000s, I thought that the open access movement would soon end academic publishing as we knew it. It has been disheartening to watch as publishing companies learned how to monetize open access leading to the cost of academic publishing reaching outrageous levels – a cost that is ultimately borne by the taxpayers who fund the majority of our research.
The reasons that 20th century scientific publishing practices persist are complex, but it is our responsibility to find alternate approaches. Preprint servers have been a major step in the right direction, but a rejection from bioRxiv makes it clear that these entities still serve as gatekeepers to the dissemination of information.
Perhaps NFTs offer a new, less costly, and more equitable, means of publishing?
nf-core is a community effort to collect a curated set of analysis pipelines built using Nextflow. This post will walk you through running the nf-core RNA-Seq workflow.
The pipeline uses the STAR aligner by default, and quantifies data using Salmon, providing gene/transcript counts and extensive quality control. Prior to alignment, the pipeline uses Trim Galore to automatically trim low quality bases from the 3′ end of reads, and perform adapter trimming, attempting to auto-detect which adapter has been used (from the standard illumina, small rna, and nextera adapters). The pipeline runs a host of other QC tools, including DESeq2 to produce a PCA plot for sample-level QC (note that this requires a minimum of two replicates per library). Results are automatically compiled into a MultiQC report and can be emailed to you upon pipeline completion.
While you have the option to provide reference genome index files to the pipeline, I recommend you provide only the FASTA and GTF files and let the pipeline generate these files the first time you run the workflow (for reproducibility), providing the --save_reference parameter so they can be saved for subsequent use (the index building step can be very time-consuming).
Instead of a path to a file, a URL can be supplied to download reference FASTA and GTF files at the start of the pipeline with the --downloadFasta and --downloadGTF parameters.
Alternatively, reference data can be obtained from AWS-iGenomes automatically by providing the --genome parameter (ex: --genome GRCh37).
As per the documentation, it’s a good idea to specify a pipeline version when running the pipeline on your data. This ensures that a specific version of the pipeline code and software are used when you run your pipeline. If you keep using the same tag, you’ll be running the same version of the pipeline, even if there have been changes to the code since.
To see what versions are available, go to the nf-core/rnaseq releases page and find the latest version number – numeric only (eg. 3.0). Then specify this when running the pipeline with -r (one hyphen) – eg. -r 3.0.
The version number will be logged in reports when you run the pipeline, so that you’ll know what you used when you look back in the future.
For additional options for trimming, ribosomal RNA removal, UMI-based read de-duplication, other alignment and quantification tools, and more see: https://nf-co.re/rnaseq/parameters
NOTE: NYU CGSB users will require an additional step (step #1), and have the ability to publish their results to the department JBrowse server (step #6).
1) Rename Fastq Files
NOTE: This step is for NYU CGSB users only
nf-core workflows expect standard illumina filenames by default. At NYU CGSB, fastq files are not named using the standard illumina file naming scheme. Therefore, CGSB users will need to run the following script prior to running any nf-core workflow. This script will create a folder within the target directory called ‘inames’ containing symlinks to the original data that use standard illumina filenames. CGSB users must then provide the path to the files in this ‘inames’ directory when creating the samplesheet (next step). Run this script as follows, providing the path to the reads and target directory as parameters:
sh /scratch/work/cgsb/scripts/rename_fastq_files/rename_fastq_files.sh \ <path_to_reads> \ <target_dir>
Example:
sh /scratch/work/cgsb/scripts/rename_fastq_files/rename_fastq_files.sh \ /scratch/cgsb/gencore/out/Gresham/2020-01-10_HV2J2BGXC/merged/ \ /scratch/$USER/project_dir
2) Prepare Samplesheet
The pipeline requires a samplesheet in csv format as input. The samplesheet must contain the following five headers: group, replicate, fastq_1, fastq_2, strandedness.
It is possible to include multiple runs of the same library in a samplesheet. The group and replicate identifiers are the same when you have re-sequenced the same sample more than once (e.g. to increase sequencing depth). The pipeline will concatenate the raw reads before alignment.
strandedness can be forward, reverse, unstranded, or auto in which case the pipeline will attempt to automatically determine the strandedness of the reads.
It is also possible to mix paired-end and single-end reads in a samplesheet.
Below is an example of a samplesheet consisting of both single- and paired-end data. This is for two experimental groups in triplicate, where the last replicate of the treatment group has been sequenced twice.
Copy this gist into your project directory and provide the path to your samplesheet, FASTA, GTF, and out_root, and your email address if you’d like to be notified when the pipeline completes or if there are any errors.
4) Running the workflow
Note: v3.0 of the RNA-Seq pipeline requires Nextflow 20.11.0-edge or higher.
On the NYU HPC, you must submit nextflow pipelines as an SBATCH job.
Copy and paste the code below into a file called launch-nextflow.s. Edit the path to your config file (-c) and version number (-r) as required, and add any additional parameters if necessary.
Once you have created this file, submit it to SLURM using the following command:
sbatch launch-nextflow.s
5) Output
Once the pipeline has completed, you will find your output files in the results directory within the directory you set as out_root in the config.
If you provided your email address, you will receive notification via email when your pipeline completes with information pertaining to your analysis as well as a comprehensive MultiQC report attached. If you did not provide your email address, you can find the MultiQC report in the results directory.
6) JBrowse
CGSB users have the option to push their results to JBrowse for visualization. To push data to JBrowse you will need to request access at https://forms.bio.nyu.edu if you have not already done so (requires PI approval). Then, simply execute the following command:
If you use nf-core/rnaseq for your analysis, please cite it using the following doi: 10.5281/zenodo.1400710
In addition, cite the nf-core publication as follows:
The nf-core framework for community-curated bioinformatics pipelines. Philip Ewels, Alexander Peltzer, Sven Fillinger, Harshil Patel, Johannes Alneberg, Andreas Wilm, Maxime Ulysse Garcia, Paolo Di Tommaso & Sven Nahnsen. Nat Biotechnol. 2020 Feb 13. doi: 10.1038/s41587-020-0439-x.
Additional Comments
Recently, I observed this warning message immediately upon launching the pipeline (for documentation purposes, this was version 3.14.0):
WARN: ~~~~~~~~~~~~~~~~~~~~~~~~~~~~~~~~~~~~~~~~~~~~~~~~~~~~~~~~~~~~~~~~~~~~~~
Multiple config files detected!
Please provide pipeline parameters via the CLI or Nextflow '-params-file' option.
Custom config files including those provided by the '-c' Nextflow option can be
used to provide any configuration except for parameters.
Docs: https://nf-co.re/usage/configuration#custom-configuration-files
~~~~~~~~~~~~~~~~~~~~~~~~~~~~~~~~~~~~~~~~~~~~~~~~~~~~~~~~~~~~~~~~~~~~~~~~~~~~
It appears that we need to move our parameters into a separate JSON file, and provide this file to the pipeline using the -params-file option. According to the documentation, this is necessary for nf-core pipelines using DSL2, which was implemented in version 2.0 of this pipeline. The warning message above, displayed upon running the pipeline, instructs us to provide pipeline parameters via the -params-file option. However, the documentation clarifies that “For Nextflow DSL2 nf-core pipelines – parameters defined in the parameter block in custom.config files WILL NOT override defaults in nextflow.config“, which might mean that you can keep your parameters in your nextflow.config file. This suggests that even though it’s possible to keep parameters in your nextflow.config file, as evidenced by my tests where the pipeline runs with all parameters in the nextflow.config file, you will still receive the warning message. Similarly, the warning will appear even when using a JSON file with the -params-file option. If you choose or need to use a JSON file for your parameters as indicated in the warning message, here is how you would proceed:
Create the JSON file with your parameters as shown below. Save this file as nf-params.json. (See documentation for JSON format here)
During the summer of 2020, the Ghedin and Gresham labs at New York University sequenced several SARS-CoV-2 isolates from clinical samples acquired in New York City. To visualize and share the data among researchers and collaborators we built a JBrowse web server. JBrowse is a web-based genome visualization software allowing you to visualize your genomic data files, such as FA, VCF, BAM, CRAM, and GFF3 files.
To benefit all researchers at NYU engaged in genomics research, we have implemented a centralized JBrowse service at NYU’s CGSB at http://jbrowse.bio.nyu.edu/ for PIs and their lab members.
Features and Benefits
Visually analyze your data in custom tracks
Specific URLs for desired views to share with external collaborators
For the most up to date documentation, click here.
We have integrated automated JBrowse visualization into existing gencore tools. For example, the results of the GATK pipeline , which performs alignment and variant calling, can now be automatically uploaded to the JBrowse site for immediate visual analysis. Within your nextflow.config file add the following lines to specify the data set name and the PI.
Each data file generated by this workflow will result in a track that you can view and customize.
Search for features of interest with the search bar at the top.
The URL will dynamically change to meet your current selection of tracks, view, and highlights. You can then use this unique URL to share with colleagues or post in publications.
Getting Started
The first step is to establish a lab specific account and request access to your PI’s lab, here. This is different from Prince and requires approval by your PI. Just like the PI shared directories on the HPC cluster, your fellow lab members have the ability to modify or delete your data.
Once you have access you can upload data into a new or existing data set. On the Prince HPC cluster there is a single command cgsb_upload2jbrowse that can run to transfer and format the data. Outside the cluster a user can rsync the data manually.
USAGE: cgsb_upload2jbrowse -p PI -d DATASET [-f FOLDER] [-s SAMPLELIST] [FILES]
-----------------------------------------------------------------------------------------
-p | --PI specify PI
-d | --dataset specify data set
-f | --folder specify folder containing files
-s | --samplelist specify sample list for categorization
-----------------------------------------------------------------------------------------
File formats supported:
- fa
- fasta
- fna
- vcf.gz*
- bam*
- bam.bw
- cram*
- gff3.gz*
- gff
*Requires index file (tbi, bai, crai) of the same base name
Example 1: To transfer your data within your scratch (/scratch/user/project1/data) that includes the reference data to Smith’s project1 data set run the following.
cgsb_upload2jbrowse -p Smith -d project1 \
-f /scratch/user/project1/data \
Example 2: To transfer your data within your scratch (/scratch/user/project1/data) along with the reference data in the prince shared genome repository folders to Smith’s project1 data set run the following.
Example 3: To transfer outside of the Prince cluster
# Transfer the files
rsync --progress -ruv /path/to/dataset/ <NYUnetID>@jbrowse.bio.nyu.edu:/jbrowse/<PI>/<DATASET>
# Build and publish the tracks based on the files uploaded
ssh <NYUnetID>@jbrowse.bio.nyu.edu addTracks --PI <PI> --dataset <DATASET>
The data will be accessible immediately on the JBrowse server. Choose your PI on the JBrowse homepage’s dropdown menu then the data set name that was specified in the previous step. Once accessed you will be able to display visualizations or tracks for each file. These tracks by default will be named after the file itself. You can find more information on customizing track names and appearance in the documentation online.
The available tracks will be selectable on the left allowing you to display only items of interest and their order displayed. If you go to the `Track` menu at the top of the page, you have two options to create a combination track combining 2 tracks or a sequence search track, which shows regions of the referenced sequence or its translations that match a DNA or amino acid sequence.
This is an updated version of the variant calling pipeline post published in 2016 (link). This updated version employs GATK4 and is available as a containerized Nextflow script on GitHub.
Identifying genomic variants, including single nucleotide polymorphisms (SNPs) and DNA insertions and deletions (indels), from next generation sequencing data is an important part of scientific discovery. At the NYU Center for Genomics and Systems Biology (CGSB) this task is central to many research programs. For example, the Carlton Lab analyzes SNP data to study population genetics of the malaria parasites Plasmodium falciparum and Plasmodium vivax. The Gresham Lab uses SNP and indel data to study adaptive evolution in yeast, and the Lupoli Lab in the Department of Chemistry uses variant analysis to study antibiotic resistance in E. coli.
To facilitate this research, a bioinformatics pipeline has been developed to enable researchers to accurately and rapidly identify, and annotate, sequence variants. The pipeline employs the Genome Analysis Toolkit 4 (GATK4) to perform variant calling and is based on the best practices for variant discovery analysis outlined by the Broad Institute. Once SNPs have been identified, SnpEff is used to annotate, and predict, variant effects.
This pipeline is intended for calling variants in samples that are clonal – i.e. a single individual. The frequencies of variants in these samples are expected to be 1 (for haploids or homozygous diploids) or 0.5 (for heterozygous diploids). To call variants in samples that are heterogeneous, such as human tumors and mixed microbial populations, in which allele frequencies vary continuously between 0 and 1 researcher should use GATK4 Mutect2 which is designed to identify subclonal events (workflow coming soon).
Base Quality Score Recalibration (BQSR) is an important step for accurate variant detection that aims to minimize the effect of technical variation on base quality scores (measured as Phred scores). As with the original pipeline (link), this pipeline assumes that a ‘gold standard’ set of SNPS and indels are not available for BQSR. In the absence of a gold standard the pipeline performs an initial step detecting variants without performing BQSR, and then uses the identified SNPs as input for BQSR before calling variants again. This process is referred to as bootstrapping and is the procedure recommended by the Broad Institute’s best practices for variant discovery analysis when a gold standard is not available.
This pipeline uses nextflow, a framework that enables reproducible and portable workflows (https://www.nextflow.io/). The full pipeline and instructions on how to use the Nextflow script are described below.
You don’t need to copy the script, but you should copy the file nextflow.config from the above directory into a new project directory. (/scratch/work/cgsb/scripts/variant_calling/gatk4/nextflow.config)
If you want to copy and run the main.nf script locally, you must copy the /bin directory as well. This needs to be in the same directory as main.nf.
You will set parameters for your analysis in the nextflow.config file
See How to Use and Examples below to learn how to configure and run the script.
This Nextflow script uses pre-installed software modules on the NYU HPC, and is tailored to the unique file naming scheme used by the Genomics Core at the NYU CGSB.
This version of the script is configured for standard Illumina filenames
This version of the script does not use software modules local to the NYU HPC, it is instead packaged with a Docker container which has all tools used in the pipeline. Integration with Docker allows for completely self-contained and truly reproducible analysis. This example shows how to run the workflow using the container. The container is hosted on Docker at: https://hub.docker.com/r/gencorefacility/variant-calling-pipeline-gatk4
Full List of Tools Used in this Pipeline
GATK4
BWA
Picard Tools
Samtools
SnpEff
R (dependency for some GATK steps)
How to Use This Script
Setting Up Nextflow
This pipeline is written in Nextflow, a computational pipeline framework. The easiest way to get setup with Nextflow is with conda. On the NYU HPC, conda is already installed and available as a module.
module load anaconda3/2019.10
Note: Use module avail anaconda to check for the latest conda version.
Update: NYU HPC users can load Nextflow using the module load command. There is no need to install via conda. Simply load the module and skip to “Setting Up The Script” below.
For users outside NYU, see the conda installation instructions, then come back and follow the rest of the instructions below.
Once you have conda loaded, make sure you add the bioconda channel (required for Nextflow) as well as the other channels bioconda depends on. It is important to add them in this order so that the priority is set correctly (if you get warnings that a channel exists and is being moved to the top, that’s OK keep going):
Create a conda environment for Nextflow. I call it ‘nf-env’ but you can call it anything you like.
conda create --name nf-env
(If you get a message asking you to update conda, press enter to proceed and allow your conda environment to be created.)
We’ll install Nextflow inside this newly created environment. Anytime we want to use Nextflow, we’ll need to load the environment first using the following command:
conda activate nf-env
When a conda environment has been loaded, you’ll see its name in parenthesis at the command prompt, for example:
(nf-env) [user@log-1 ~]$
Once you’ve activated your conda environment, install nextflow using:
conda install nextflow
(When you’re finished with nextflow, deactivate the environment using conda deactivate)
Setting Up The Script
Once you have Nextflow setup, we can run the pipeline. The pipeline requires six mandatory input parameters to run. The values can be hard coded into a config file, or provided as command line arguments (examples below).
1) params.reads The directory with your FastQ libraries to be processed, including a glob path matcher. Must include a paired end group pattern matcher (i.e. {1,2}). Example: params.reads = "/path/to/data/*_n0{1,2}_*.fastq.gz" or params.reads = "/path/to/data/*_R{1,2}_*.fastq.gz"
2) params.ref Reference genome to use, in fasta format. If you’re at the NYU CGSB, there’s a good chance your genome of interest is located in the Shared Genome Resource (/scratch/work/cgsb/genomes/Public/). Selecting a reference genome from within the Shared Genome Resource ensures that all index files and reference dictionaries required by BWA, Picard, GATK, etc. are available. If you’re using your own reference data, you will need to build index files for BWA (using BWA), a fasta index (using samtools), and a reference dictionary (using Picard Tools). These files need to be located in the same directory as the reference fasta file.
3) params.snpeff_dbThe name of the SnpEff database to use. To determine the name of the SnpEff DB to use, ensure you have snpeff installed/loaded and then issue the databases command.
# On the NYU HPC you can load SnpEff using module load module load snpeff/4.3i
# $SNPEFF_JAR is the path to the snpEff.jar file. # On the NYU HPC this is automatically set to the # snpEff.jar path when the module is loaded java -jar $SNPEFF_JAR databases | grep -i SPECIES_NAME
From the list of returned results, select the database you wish to use. The value of the first column is the value to input for params.snpeff_db.
For example if you wanted to use the Arabidopsis Thaliana SnpEff database:
Note: If your organism is not available in SnpEff, it is possible to create a custom SnpEff Database if a reference fasta and gff file are available.
4) params.outdir By default, output files will go into params.outdir/out, temporary GATK files will go into params.outdir/gatk_temp, SnpEff database files will go into params.outdir/snpeff_db, and Nextflow will run all analysis in params.outdir/nextflow_work_dir.These individual paths can be overridden by specifying the params.out, params.tmpdir, params.snpeff_data, and the workDir parameters respectively. Note: There is no params. prefix for workDir.
5) params.pl Platform. E.g. Illumina (required for read groups)
6) params.pm Machine. E.g. nextseq (required for read groups)
Examples
Note: If you are working on the NYU HPC, you should run all nextflow jobs in an interactive slurm session. This is because Nextflow uses some resources in managing your workflow.
Once you have set up your nextflow environment you can perform your analysis in multiple ways. Below I describe four different ways this can be done.
Scenario 1: Hard code all parameters in config file
Copy the nextflow.config file into a new directory (see Script Location). Edit the first six parameters in this file, e.g.:
After activating your conda environment with Nextflow installed, run:
nextflow run main.nf
By default, Nextflow will look for a config file called nextflow.config inside the directory from which Nextflow was launched. You can specify a different config file on the command line using -c:
nextflow run main.nf -c your.config
Note: Parameters hard coded in the config can be overridden by arguments passed through the command line. See following scenario.
Scenario 2: Call the script providing all required parameters through the command line (after activating your Nextflow conda environment)
Note: You are able to set/override any and all parameters in this way.
Scenario 3: Call directly from GitHub Nextflow allows you to run scripts hosted on GitHub directly. There is no need to download the script (main.nf) to your local computer. Rather, you can call the variant calling pipeline script directly from github by entering the following command:
nextflow run gencorefacility/variant-calling-pipeline-gatk4
In this scenario you still need the config file (which you can download from the git repo) to set your parameters (see Scenario 1), or pass parameters through the command line (see Scenario 2).
Scenario 4: Use with a Docker container
All software tools used in the pipeline have been packaged in a Docker container. You can instruct Nextflow to use a containerized Docker image for the analysis by passing the -with-docker or -with-singularity flags and the container. Calling the script directly from GitHub and telling it to use this docker image looks like this:
nextflow run gencorefacility/variant-calling-pipeline-gatk4 -with-docker gencorefacility/variant-calling-pipeline-gatk4
Launching Nextflow
Once Nextflow begins running, it will actively manage and monitor your jobs. If you’re working on the HPC at NYU, the corresponding nextflow.config file contains the line process.executor = 'slurm' which instructs Nextflow to submit jobs to SLURM. You can monitor your jobs in real time using watch and squeue:
watch squeue -u <netID>
Note: Since Nextflow actively manages your jobs, the session in which Nextflow is running must remain open. For example, if Nextflow is running and you lose power or network, Nextflow will be terminated. To avoid this, I recommend running Nextflow inside a tmux session, using nohup, or even submitting the nextflow script as a SLURM job. My preference is to use tmux (terminal multiplexer).
Enter the command tmux to enter a tmux session. Launch an interactive slurm session if you are on the NYU HPC. Activate your conda environment. Now, you can launch your Nextflow script.
“Detach” from the tmux session at any time by pressing “ctrl” + “B” together, then pressing “D” (for detach). If you ever lose power, connection, or detach, you can reattach your tmux session by typing tmux a. You will find your session running just as when you last left it.
If your Nextflow script does get interrupted for some reason, you can always resume the pipeline from the last successfully completed step using the -resume flag:
nextflow run main.nf -resume
Workflow Overview
Step 1
Alignment – Map to Reference
Tool
BWA MEM
Input
.fastq files reference genome
Output
aligned_reads.sam
Notes
-Y tells BWA to use soft clipping for supplementary alignments -K tells BWA to process INT input bases in each batch regardless of nThreads (for reproducibility) Readgroup info is provided with the -R flag. This information is key for downstream GATK functionality. GATK will not work without a read group tag.
In GATK4, the Mark Duplicates and Sort Sam steps have been combined into one step using the MarkDuplicatesSpark tool. In addition, the BAM index file (.bai) is created as well by default. The tool is optimized to run on queryname-grouped alignments (that is, all reads with the same queryname are together in the input file). The output of BWA is query-grouped, however if provided coordinate-sorted alignments, the tool will spend additional time first queryname sorting the reads internally. Due to MarkDuplicatesSpark queryname-sorting coordinate-sorted inputs internally at the start, the tool produces identical results regardless of the input sort-order. That is, it will flag duplicates sets that include secondary, and supplementary and unmapped mate records no matter the sort-order of the input. This differs from how Picard MarkDuplicates behaves given the differently sorted inputs. (i.e. coordinate sorted vs queryname sorted).
You don’t need a Spark cluster to run Spark-enabled GATK tools. If you’re working on a “normal” machine (even just a laptop) with multiple CPU cores, the GATK engine can still use Spark to create a virtual standalone cluster in place, and set it to take advantage of however many cores are available on the machine — or however many you choose to allocate. (https://gatk.broadinstitute.org/hc/en-us/articles/360035890591?id=11245)
samtools depth -a sorted_dedup_reads.bam > depth_out.txt
Step 4
Call Variants
Tool
GATK4
Input
sorted_dedup_reads.bam reference genome
Output
raw_variants.vcf
Notes
First round of variant calling. The variants identified in this step will be filtered and provided as input for Base Quality Score Recalibration (BQSR)
The filters below are a good starting point provided by the Broad. You will need to experiment a little to find the values that are appropriate for your data, and to produce the tradeoff between sensitivity and specificity that is right for your analysis.
QD < 2.0: This is the variant confidence (from the QUAL field) divided by the unfiltered depth of non-hom-ref samples. This annotation is intended to normalize the variant quality in order to avoid inflation caused when there is deep coverage. For filtering purposes it is better to use QD than either QUAL or DP directly.
FS > 60.0: This is the Phred-scaled probability that there is strand bias at the site. Strand Bias tells us whether the alternate allele was seen more or less often on the forward or reverse strand than the reference allele. When there is little to no strand bias at the site, the FS value will be close to 0.
MQ < 40.0: This is the root mean square mapping quality over all the reads at the site. Instead of the average mapping quality of the site, this annotation gives the square root of the average of the squares of the mapping qualities at the site. It is meant to include the standard deviation of the mapping qualities. Including the standard deviation allows us to include the variation in the dataset. A low standard deviation means the values are all close to the mean, whereas a high standard deviation means the values are all far from the mean.When the mapping qualities are good at a site, the MQ will be around 60.
SOR > 4.0: This is another way to estimate strand bias using a test similar to the symmetric odds ratio test. SOR was created because FS tends to penalize variants that occur at the ends of exons. Reads at the ends of exons tend to only be covered by reads in one direction and FS gives those variants a bad score. SOR will take into account the ratios of reads that cover both alleles.
MQRankSum < -8.0: Compares the mapping qualities of the reads supporting the reference allele and the alternate allele.
ReadPosRankSum < -8.0: Compares whether the positions of the reference and alternate alleles are different within the reads. Seeing an allele only near the ends of reads is indicative of error, because that is where sequencers tend to make the most errors.
Note: SNPs which are ‘filtered out’ at this step will remain in the filtered_snps.vcf file, however they will be marked as ‘_filter’, while SNPs which passed the filter will be marked as ‘PASS’. We need to extract and provide only the passing SNPs to the BQSR tool, we do this in the next step (step 9).
The filters below are a good starting point provided by the Broad. You will need to experiment a little to find the values that are appropriate for your data, and to produce the tradeoff between sensitivity and specificity that is right for your analysis.
QD < 2.0: This is the variant confidence (from the QUAL field) divided by the unfiltered depth of non-hom-ref samples. This annotation is intended to normalize the variant quality in order to avoid inflation caused when there is deep coverage. For filtering purposes it is better to use QD than either QUAL or DP directly.
FS > 200.0: This is the Phred-scaled probability that there is strand bias at the site. Strand Bias tells us whether the alternate allele was seen more or less often on the forward or reverse strand than the reference allele. When there is little to no strand bias at the site, the FS value will be close to 0.
SOR > 10.0: This is another way to estimate strand bias using a test similar to the symmetric odds ratio test. SOR was created because FS tends to penalize variants that occur at the ends of exons. Reads at the ends of exons tend to only be covered by reads in one direction and FS gives those variants a bad score. SOR will take into account the ratios of reads that cover both alleles.
Note: Indels which are ‘filtered out’ at this step will remain in the filtered_snps.vcf file, however they will be marked as ‘_filter’, while SNPs which passed the filter will be marked as ‘PASS’. We need to extract and provide only the passing indels to the BQSR tool, we do this next.
This round of BQSR is optional. It is required if you want to produce a recalibration report with the Analyze Covariates step (next). For this round of BQSR, you provide the recalibrated reads obtained from the Apply BQSR step above as input.
The filters below are a good starting point provided by the Broad. You will need to experiment a little to find the values that are appropriate for your data, and to produce the tradeoff between sensitivity and specificity that is right for your analysis.
QD < 2.0: This is the variant confidence (from the QUAL field) divided by the unfiltered depth of non-hom-ref samples. This annotation is intended to normalize the variant quality in order to avoid inflation caused when there is deep coverage. For filtering purposes it is better to use QD than either QUAL or DP directly.
FS > 60.0: This is the Phred-scaled probability that there is strand bias at the site. Strand Bias tells us whether the alternate allele was seen more or less often on the forward or reverse strand than the reference allele. When there is little to no strand bias at the site, the FS value will be close to 0.
MQ < 40.0: This is the root mean square mapping quality over all the reads at the site. Instead of the average mapping quality of the site, this annotation gives the square root of the average of the squares of the mapping qualities at the site. It is meant to include the standard deviation of the mapping qualities. Including the standard deviation allows us to include the variation in the dataset. A low standard deviation means the values are all close to the mean, whereas a high standard deviation means the values are all far from the mean.When the mapping qualities are good at a site, the MQ will be around 60.
SOR > 4.0: This is another way to estimate strand bias using a test similar to the symmetric odds ratio test. SOR was created because FS tends to penalize variants that occur at the ends of exons. Reads at the ends of exons tend to only be covered by reads in one direction and FS gives those variants a bad score. SOR will take into account the ratios of reads that cover both alleles.
MQRankSum < -8.0: Compares the mapping qualities of the reads supporting the reference allele and the alternate allele.
ReadPosRankSum < -8.0: Compares whether the positions of the reference and alternate alleles are different within the reads. Seeing an allele only near the ends of reads is indicative of error, because that is where sequencers tend to make the most errors.
Note: SNPs which are ‘filtered out’ at this step will remain in the filtered_snps.vcf file, however they will be marked as ‘_filter’, while SNPs which passed the filter will be marked as ‘PASS’.
The filters below are a good starting point provided by the Broad. You will need to experiment a little to find the values that are appropriate for your data, and to produce the tradeoff between sensitivity and specificity that is right for your analysis.
QD < 2.0: This is the variant confidence (from the QUAL field) divided by the unfiltered depth of non-hom-ref samples. This annotation is intended to normalize the variant quality in order to avoid inflation caused when there is deep coverage. For filtering purposes it is better to use QD than either QUAL or DP directly.
FS > 200.0: This is the Phred-scaled probability that there is strand bias at the site. Strand Bias tells us whether the alternate allele was seen more or less often on the forward or reverse strand than the reference allele. When there is little to no strand bias at the site, the FS value will be close to 0.
SOR > 10.0: This is another way to estimate strand bias using a test similar to the symmetric odds ratio test. SOR was created because FS tends to penalize variants that occur at the ends of exons. Reads at the ends of exons tend to only be covered by reads in one direction and FS gives those variants a bad score. SOR will take into account the ratios of reads that cover both alleles.
Note: Indels which are ‘filtered out’ at this step will remain in the filtered_snps.vcf file, however they will be marked as ‘_filter’, while SNPs which passed the filter will be marked as ‘PASS’.
A single report file is generated with summary statistics for each library processed containing the following pieces of information:
# of Reads # of Aligned Reads % Aligned # Aligned Bases Read Length % Paired % Duplicate Mean Insert Size # SNPs, # Filtered SNPs # SNPs after BQSR, # Filtered SNPs after BQSR Average Coverage
Give the script a sample id and it will look for the corresponding sample_id_* files (listed in the input section above) and print the statistics and header to stdout.
In the Kenneth Birnbaum Lab, we are interested in understanding how the plant root is able to grow continuously over the plant’s life and maintain its specific root structure (Fig.1). More specifically, what is the role of the stem cells present at the very tip of the root (QC and initials), in this maintenance and development.
Figure 1: The plant model Arabidopsis thaliana has a very simple but highly organized Root apical meristem. It is from the division of the QC cells (in grey) and the initials (highlighted in black) that all other cells mature and develop as they move away from the QC.
The fascinating part of plant growth in general is its capacity of continuous growth over the plant’s life. This is due to a very specific set of embryonic cells located at the very tip of the root or shoot, respectively called the Root or Shoot Apical meristem (RAM or SAM). In the case of the root, these cells slowly divide to give rise to the different cell types constituting the root. From these first divisions, cells continue to divide and differentiate, forming a gradient until they fully mature to form the functional root.
During this process very specific sets of genes are successively activated and repressed to allow this slow maturation along the meristem. In addition, these distinct genetic programs are different depending on the cell type composing the meristem. However, so far technical limitations have prevented researchers from having full knowledge of these specific genes.
The power of single cell RNA seq (scRNA-seq) allows us to get a complete snapshot of every cell composing the meristem and recreate a transcriptome map allowing us to decipher the multiple mechanisms of cell maturation.
This new procedure of single cell RNA-seq is actually quite simple:
The first crucial step is to get the single cells from the root tip of our plant of interest. To perform this step, we rely on a cocktail of enzymes able to digest the complex cell wall matrix that binds the cells together. We do this as follows:
Seedlings of the plant model Arabidopsis thaliana are grown in vitro on MS medium, and at the appropriate age root tips are sectioned and transferred into our cocktail of enzymes. After 1-2h the cell wall is digested, and cells are freely released in solution. Cells are then washed from the enzyme, carefully counted to assess their quality and viability and then directly processed through the 10X chromium system.
This machine combines together, through a microfluidic device, the plant cells with poly-T beads and releases them into a droplet of oil. The final product is an emulsion of thousands of droplets containing the cells and the beads (Fig.2).
Figure 2: Workflow of single cell RNA-seq.
The cDNA synthesis is performed directly inside each droplet allowing for rapid and easy processing, and preventing RNA degradation. As each bead contains a distinct specific barcode, cDNA from the same droplet get the same barcode necessary to sequence and identify the cell.
Sequencing of the 10x libraries is performed on site by the Genomics Core team and data is aligned on the genome of interest using software provided by 10x genomics called Cell Ranger. Data are then analyzed using the R package Seurat, developed at NYU and the New York Genome Center by the team of Rahul Satija.
Seurat allows for the clustering of all sequenced cells depending on their respective transcriptome. Identification of cluster cell identity is performed by comparing marker gene expression and previously published transcriptome data (Fig. 3).
Results obtained allow us to draw a map containing every cell type present in the meristem of the plant model Arabidopsis thaliana. In addition, we are able to draw the maturation path of the cells by identifying younger and older tissue (Fig. 3 arrows). This map is of unprecedented accuracy and constitutes the starting point to identify new genes and mechanisms specific to each cell type.
Moreover, single cell analysis can be performed on Arabidopsis mutants, meristem after wounding, or specific treatments to identify cell type specific response and genetic programs involved. This is the ongoing work performed in Kenneth Birnbaum lab, and specifically on root regeneration.
Figure 3: TSNE plot obtained using the R package Seurat, each dot corresponds to a single cell sequenced. The cells are aggregated in clusters represented by different colors according to their transcriptome. The identification of the cell identity in the original arabidopsis root is performed by comparing expression of key marker genes of the different cell types. On the upper right shown in blue is the expression of an endodermal marker, similarly the graph on the lower right shows the expression of a columella and lateral root cap marker.
Next-generation sequencing technologies have allowed for sequencing at a low cost and fast speed, and is used more and more to study microbial communities. RNA-seq metatranscriptome and WGS metagenome studies aim to investigate microbial communities at genome and transcriptome levels. In this article, I will introduce a few tools that I frequently use to analyze metagenomic and metatranscriptomic datasets.
Generating Microbial community taxonomy profiles
Since a variety of microbes live in the microbial community at differential relative abundances, the first question researchers usually ask is who is present and at what relative abundance. Kraken (https://ccb.jhu.edu/software/kraken2/) is one of the most frequently used tools to classify microbial community taxonomic information. Kraken uses a K-mer based searching algorithm to assign taxonomic labels to the reads (Fig. 1). Another frequently used tool is MetaPhlan (http://huttenhower.sph.harvard.edu/metaphlan2), which uses clade-specific marker genes to study the microbiome taxonomic composition (Fig. 2). Both approaches are popularly used in microbiome researches and efficient in run time.
Figure 1. Kraken uses a K-mer based searching algorithm to assign taxonomic labels to the reads Figure 2. MetaPhlan uses clade-specific marker genes to study the microbiome taxonomic composition
Generating Microbial community gene expression profiles
Another question researchers investigate with regards to metagenomic and metatranscriptomic datasets is the presence/expression of bacterial genes in the microbial community. HUMAnN2 is one of the most popular tools in analyzing the bacterial gene expression profiles. Different levels of information can be learned through running HUMAnN2, the reads are first assigned to bacterial taxa and both the mapped and unmapped reads are searched against the protein databases for gene assignments. Gene family abundance, pathway abundance and coverage can be learned from the HUMAnN2 output.
A different approach to investigate the microbial community is through assembling the reads into contigs. This allows researchers to identify novel bacterial genomes and genes. A lot of assemblers are designed specifically for metagenomic datasets, such as metaSPAdes and MEGAHIT. These assemblers use k-mer based De Bruijn graphs, which have advantages in handling errors in reads and DNA repeats and used a lot in metagenome assembly.
Figure 4. K-mer based De Bruijn graphs used in genome assembly
Metagenomic and metatranscriptomic datasets contain vast amounts of information including taxonomy classification and gene expression information. Many tools have been developed to extract information from these datasets to allow researchers investigate the microbial community and ask questions of their interest. I am only briefly introducing a few popular tools developed for different purposes. I hope this can be helpful for people who are interested in microbiome research and looking for software to learn the information they are interested in. For more details about the above-mentioned software please see the links and the references below.
1. Nurk, S., et al., metaSPAdes: a new versatile metagenomic assembler. Genome Res, 2017. 27(5): p. 824-834.
2. Franzosa, E.A., et al., Species-level functional profiling of metagenomes and metatranscriptomes. Nat Methods, 2018. 15(11): p. 962-968.
3. Li, D., et al., MEGAHIT: an ultra-fast single-node solution for large and complex metagenomics assembly via succinct de Bruijn graph. Bioinformatics, 2015. 31(10): p. 1674-6.
In this article I’ll go over three Nextflow patterns I frequently use
to make development of Nextflow data processing pipelines easier and
faster. I use each of these in most of my workflows, so they really come
in handy.
I am assuming here that you know what processes, channels, strings,
closures, directives and operators are and are somewhat comfortable
writing Groovy and Nextflow code. If you want further details on any of
the topics I am touching on in this article, check out the Nextflow documentation for explanation of all these concepts and more.
Let’s start with the first one, that probably gives you the biggest speedup for developing your pipelines.
1. Reducing the number of input files during development
Commonly when developing a pipeline, we do not want to run it on all
data at once. This way it runs (and fails!) quickly, so we can develop
it more quickly! Then when we are happy with our pipeline, we can run
all of our data through it.
Instead, I like using the take operator on my main channel of inputs, only letting a set number of items through the channel. Because I do not want this to always be the case, I make it conditional on a params variable params.dev. Any variable specified as params.somevariable can be set to somevalue on the commandline by invoking nextflow run pipeline.nf --somevariable somevalue.
Explanation: This example snippet first fills a channel with the numbers from 1 to 300. Then either params.number_of_inputs many of those numbers (here by default 2) or all of them (when params.dev is false and take receives -1 as input), are let through by the take operator, and those numbers that make it through are printed.
In this example params.dev is by default false, so when developing a pipeline, we simply add the --dev flag to set it to true, like so:
nextflow run conditional_take.nf --dev
Now our pipeline only lets through the first two numbers:
N E X T F L O W ~ version 19.09.0-edge
Launching `conditional_take.nf` [scruffy_shannon] - revision: 1e3507df3d
1
2
If we were to run the pipeline without the --dev flag, it prints all the numbers from 1 to 300:
N E X T F L O W ~ version 19.09.0-edge
Launching 'conditional_take.nf' [scruffy_shannon] - revision: 1e3507df3d
1
2
3
[4-298 omitted here]
299
300
2. Collecting output files of a process with publishDir
Nextflow frees us from thinking about where files produced by a
process end up and making sure they are available for the next process
that uses them.
However, often we want to see files output by a process without having
to dig into the work directory.
For this we use the publishDir directive in our process to tell Nextflow in which directory we want to publish our files that are tracked in the output: channel(s) of the process.
publishDir is the NUMBER ONE THING new users ask for on the Nextflow gitter channel because we are so used to having to track where files are manually.
The publishDir directive takes a directory relative to where we are running the pipeline from.
We can also give it a glob pattern to specify files with which extensions should be published.
Although it’s not explicitly mentioned in the documentation, we can specify publishDir
multiple times for the same process, which can be useful if a process
produces multiple types of files and we want to publish several
different groupings of the same files.
Also useful, publishDir allows us to provide a closure to specify the path/ filename a file should be saveAs (relative to the publishDir), given the name of the file.
This last one is a bit tricky because the closure does not get passed a file object but just a string.
Hence, in order to use file methods like getSimpleName, we first have to turn turn the passed string into a file file(it).
I have coded up an example below, where we pass a fruit and a baked good to someprocess and publish the resulting fruit_file and pastry_file in different directories:
Channel
.from(['apples', 'tarte'], ['peach', 'pie'])
.set{input_ch}
process someprocess {
publishDir "fruits", pattern: '*.fruit', saveAs: { "${file(it).getSimpleName()}.${file(it).getExtension()}"}
publishDir "pastries", pattern: '*.pastry'
input:
set val(fruit), val(pastry) from input_ch
output:
set file(fruit_file), file(pastry_file) into output_ch
script:
fruit_file = "${fruit}.pastry.fruit"
pastry_file = "${pastry}.fruit.pastry"
"""
touch $fruit_file
touch $pastry_file
"""
}
We want to publish the fruit_files in the directory fruits and want
to only keep the last file extension and the file name (i.e. remove the
.pastry from the file).
The pastry_files we will publish in the pastries directory.
Let’s run it:
nextflow run do_you_have_a_minute_to_talk_about_publishdir.nf
N E X T F L O W ~ version 19.09.0-edge
Launching 'do_you_have_a_minute_to_talk_about_publishdir.nf' [mad_mestorf] - revision: d436b24a1c
executor > local (2)
[92/97d75e] process > someprocess (2) [100%] 2 of 2 ✔
Let’s see where our files ended up:
$ ls fruits
apples.fruit
peach.fruit
$ ls pastries
pie.fruit.pastry
tarte.fruit.pastry
Perfect, this is what we specified the two separate publishDir directives for – see the fruits only have one extension whereas the pastries retained all of theirs.
Note that you could also publish the same file multiple times, which can be useful in some instances.
Finally, by default publishDir makes a symbolic link (see mode in the publishDir section of the docs) but you can also have the files copied, hard-linked, or even moved.
The latter is not recommended because it breaks reruns.
3. Making a custom config file within a process
For this section, I am assuming you know how string interpolation in Groovy works, if not, click the link for a little refresher.
Some software requires a custom config file.
Now while of course we could require our end-user to supply a config
file to our pipeline, if possible, we’d like to automate that – it
usually just adds unnecessary complexity to workflows that we want to
hide from the user.
Let’s break the code for this example up into bits.
First the input:
A common reason why tools require you to specify some config file is them having multiple input files.
Here our input_ch consist of some genome names (strain_1
and strain_2) and their associated fasta files which are required for
our example config file format.
Having a separate name for a genome could be necessary because filenames can include forbidden characters for some output file format. An example would be parentheses in genome names being forbidden in Newick files because they have syntactic meaning.
process software_that_requires_as_custom_config {
publishDir "custom_config"
input:
set val(genome_names), file(genome_fastas) from input_ch
output:
file(custom_config) into output_ch
The first portion of this process definition is just the usual –
input channels and output channels and for convenience of the example, a
publishDir.
In the script part we first transpose the genome_names and genome_fastas to get a list of lists in which each name is paired up with its corresponding fasta file.
Building a multi-line Groovy string –> one-line bash string
Here is what we want our final config file to look like:
$ cat custom_config/custom.config
#list of all our genome_names and genome_fastas:
strain_1 = lmao_this_file_name_is_a_mess_strain1.fasta
strain_2 = strain2_some_totally_random_filename.fasta
We build the text of our config file into a variable config_file.
The intent here is to make a one-line string that we can printf into our config file.
We indent it to make it more readable and strip those indents again with stripIndents.
Note that this will only work if the indents are the same for every line
– it’s crucial that the first line of this multiline string only has the “”” and nothing else.
Otherwise stripIndents would count this multiline string as not indented.
An additional gotcha is that this multiline Groovy string should eventually turn into one line in bash.
As a result, to get a \n (newline character for printf) in our bash script, we have to write \\n in our Groovy script.
Then we can use collect to add a custom string for each name & fasta pairing to our config file.
This produces a list and we don’t want the [] to end up in our string, so we additionally use join to concatenate all the list items into a string.
Finally the whole string needs to be split by newline (this is the Groovy newlines, not our \\n) and joined again.
The actual bash portion of this script just printfs the contents of our one-line string into our config file.
script:
custom_config = 'custom.config'
name_fasta_pairing = [genome_names, genome_fastas.collect()].transpose() // these are now organized like this: [[name1, fasta1], [name2, fasta2]]
config_file = """
#list of all our genome_names and genome_fastas:\\n
${name_fasta_pairing.collect{"${it[0]} = ${it[1]}\\n"}.join()}
""".stripIndent().split('\n').join('')
"""
printf '$config_file' >> $custom_config
"""
}
Now you may wonder why we needed to go through all the nonsense of
escaping bash syntax in our Groovy string – why not make a Groovy string
and write directly to a file using Groovy?
The problem here lies with where this Groovy code gets executed.
The following would create the config file in the directory from where
we run the workflow, rather than inside the work directory:
config_file = """
#list of all our genome_names and genome_fastas:
${name_fasta_pairing.collect{"${it[0]} = ${it[1]}\n"}.join()}
""".stripIndent()
file(custom_config) << config_file
This leads to problems because the file would be overwritten every run, so for now our clunky solution has to do.
Let’s run it:
nextflow run write_custom_config_files_within_process.nf
N E X T F L O W ~ version 19.09.0-edge
Launching 'write_custom_config_files_within_process.nf' [special_cuvier] - revision: 08a6a5850d
executor > local (1)
[1b/a693d8] process > software_that_requi... [100%] 1 of 1 ✔
And it looks just how we wanted it:
$ cat custom_config/custom.config
#list of all our genome_names and genome_fastas:
strain_1 = lmao_this_file_name_is_a_mess_strain1.fasta
strain_2 = strain2_some_totally_random_filename.fasta
I hope this article was informative and you learned at least one new thing.
Comparing HighPrep PCR and AMPureXP for cleanup and size selection
Written by Hana Husic
High-throughput sequencing requires precise size selection of DNA fragments in order to increase the amount of usable data generated. If the fragments are too small, sequencing reads could be contaminated with adapter sequences. If the fragments are too long, library quantification is not as accurate and the run could under-cluster, producing less reads. Therefore, size selection is one of the most important steps to consider when preparing your library for sequencing.
AMPureXP beads are widely used for DNA cleanup and size selection. Here, we will compare the performance of AMPureXP beads with HighPrep PCR beads (manufactured by MagBio Genomics). They are available at approximately 40% the cost of AMPure beads, providing a low-cost alternative for cleanup and size selection.
Starting Sample
The input is a post-amplification DNA library taken from midway through the Nextera XT protocol with a concentration of 5.07 ng/uL, which was determined using a Qubit fluorometer. An electropherogram of the sample run on an Agilent TapeStation is shown below.
Bead Purification Protocol
Resuspend room temperature beads
Add beads to 20 uL of input sample at the correct ratio
1.8:1 bead to sample ratio (36 uL beads) removes adapter dimer
0.8:1 bead to sample ratio (16 uL beads) removes fragments <200 bp
Pipette mix 10 times
Incubate 5 min at RT
Place reaction tubes onto a magnetic tube holder for 2 min
Aspirate cleared solution
Leave ~10 uL behind to avoid aspirating beads
Dispense 200 uL 80% ethanol and incubate 30 sec at RT. Aspirate out ethanol and discard.
Leave samples on magnet for ethanol wash steps
Repeat step 6 for a total of two ethanol washes
Ensure all ethanol is removed after the second wash by using a smaller pipette to remove residual droplets
Let the beads dry for 5 to 7 min
Remove the reaction tubes from the magnet
Add 20 uL elution butter and pipette mix 10 times
Incubate 5 min at RT
Place reaction tubes onto the magnet for 1 min
Aspirate and collect eluant, leaving behind 3-5 uL buffer to avoid aspirating beads
Size-Selected Product Comparison
The input sample and all size-selected products were analyzed on a Qubit fluorometer and an Agilent TapeStation to determine concentration and size.
Qubit Results
Sample Name
Concentration in ng/uL
Input
5.07
0.8x HighPrep
1.82
0.8x Ampure
1.81
1.8x HighPrep
3.00
1.8x Ampure
2.86
As shown in the table above, there is a negligible difference in output concentration between samples cleaned at the same bead:sample ratio, regardless of the type of beads used.
An electropherogram of the input and size-selected products is shown above. Both 1.8x reactions were effective at removing adapter dimers and other small fragments of DNA. Additionally, both 0.8x reactions removed fragments smaller than 200 bp. The traces for reactions at the same bead:sample ratio are almost identical.
Conclusion
Based on the concentrations obtained from Qubit and the fragment sizes obtained from the Agilent Tapestation, we can conclude that there is no variation between DNA samples cleaned up using Ampure beads or those using HighPrep PCR beads. Thus, researchers can use the more cost-effective HighPrep PCR beads to do their cleanup and size selection without compromising performance.
Please contact GenCore with additional questions, or to obtain the official HighPrep PCR Bead quote from MagBio (NYU use only).
Gene Set Enrichment Analysis (GSEA) is a common method to analyze RNA-Seq data that determines whether a predefined defined set of genes (for example those in a GO term or KEGG pathway) show statistically significant and concordant differences between two biological phenotypes. There are a myriad of tools for GSEA analysis, and one of them which I particularly like is clusterProfiler. Developed as an R-based tool, clusterProfiler has until now been inaccessible to users unfamiliar with the R programming language. NASQAR, recently developed by the core bioinformatics team at the NYU Center for Genomics and Systems Biology, now makes clusterProfiler available as a web app with a simple UI, enabling anyone to use clusterProfiler and perform GSEA with GO Term and KEGG Pathway gene set data in minutes.
Upload a CSV file containing a list of gene names and log2 fold change values. This data is typically produced by differential expression analysis tool such as DESeq2*
* If you don’t have this data, you can run the DESeq2 app built into NASQAR to perform DE analysis (you’ll need to provide gene count data). Alternatively, you can use the sample data available in the app to follow along.
Parameters
Once your data is uploaded, you’ll need to select the appropriate columns in your CSV and set the following parameters before your data can be analyzed:
this is the source of the annotation (gene ids). This might be ENSEMBL, NCBI, ENTREZID, etc. Available options for your organism are available in a dropdown list to select from.
Ontology
GO Term ontology, one of “BP” (Biological Process), “MF’ (Molecular Function), “CC” (Cellular Component), or “ALL”
Number of Permutations
the higher the number of permutations you set, the more accurate your result will, but the longer the analysis will take (increased compute time).
minGSsizeminimum
number of genes in set (gene sets with lower than this many genes in your dataset will be ignored).
maxGSSizemaximum
number of genes in set (gene sets with greater than this many genes in your dataset will be ignored).
pAdjustMethod
one of “holm”, “hochberg”, “hommel”, “bonferroni”, “BH”, “BY”, “fdr”, “none”
Output
Once your results are ready you can visualize your enriched gene set data in various ways.
Dotplot
Visualize the top activated and suppressed enriched GO Terms or KEGG Pathways.
Enrichment Map
Organizes enriched terms into a network with edges connecting overlapping gene sets. In this way, mutually overlapping gene sets tend to cluster together, making it easy to identify functional modules.
GSEA Plot
Plot of the Running Enrichment Score (green line) for a gene set as the analysis walks down the ranked gene list, including the location of the maximum enrichment score (the red line). The black lines in the Running Enrichment Score show where the members of the gene set appear in the ranked list of genes, indicating the leading edge subset.
The Ranked list metric shows the value of the ranking metric (log2 fold change) as you move down the list of ranked genes. The ranking metric measures a gene’s correlation with a phenotype.
Ridgeplot
Grouped by gene set, density plots are generated by using the frequency of fold change values per gene within each set. Helpful to interpret up/down-regulated pathways.
PubMed Trend of Enriched Terms
The number of publications per year based on the query result from PubMed Central.
Enriched KEGG Pathway Plot
Summary
GSEA is a powerful and common analysis method for RNA-Seq experiments and is normally employed after differential expression analysis, for example when studying genes that are differently expressed under different conditions. NASQAR provides an intuitive interface that allows users to perform this analysis easily and efficiently.
Additional Material
If you’d like to learn how to use clusterProfiler in R, checkout this tutorial: